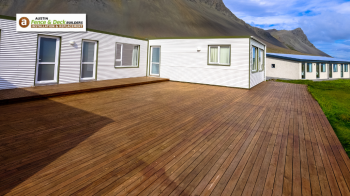
Many homeowners focus on deck building because it will create a comfortable and fun outdoor space for friends and family members to socialize. They can eat outside, have barbecues, and enjoy every moment easily.
Building a deck can be easy when you break things down into small sections. Work through each step slowly and understand what you’re doing to be safe and avoid errors and problems. Let’s learn how to build a deck!

Seven Stages of Building a Deck
Here are the stages for building a deck directly onto the house by yourself:
- A basic rectangular or square deck will attach to the side of your home. To ensure that it’s solid and durable, one side of your deck should be attached to the structural area of the house with a ledger board.
- A heavy deck beam supports the opposite side of your deck. It runs parallel to the home and sits on vertical posts. They are supported by concrete piers or footings sunk into the ground.
- Your ledger board forms a side of the outer framework. The header joist forms the other three sides parallel to the home, and the two outer rim joists are perpendicular to the house.
- You also have wood floor joists within the framework, which run perpendicular to your home.
- The deck boards are then attached to the joist tops.
- A staircase helps you get to the deck from the outside.
- Putting in a railing adds more safety. Elevated decks with stairs require a handrail around your deck perimeter and on the stairs.
Permits and Building Codes
In most cases, you will have to get a permit for your elevated and attached deck, done at the local building department and the local permitting office. One benefit of having a detached floating deck (ground-level deck) is that it may not require a permit if it sits below a specific height of 30 inches in most areas.
However, permitting is often required when the project’s deck gets attached to the house. Likewise, you may build it to sit higher, adding balusters and rails. Call the local underground utility service to locate the utilities before digging holes!
Learn More: How Much Does It Cost to Build a Deck in 2025? Everything You Should Know
Timing for Building a Deck
The best time to build a deck is in early autumn, especially if you hire someone. Job orders often taper off around this time. Plus, the ground isn’t frozen and is usually softer. Cooler temps and dry areas will help the experts complete the deck quickly.
If you plan to do it yourself, you might feel pressure to finish it before winter. Therefore, you might want to start in late spring.
Cost of Building a Deck
Building an attached deck with pressure-treated wood deck boards costs about $2,000 to $5,000, depending on your chosen size. On average, a professionally built deck with stairs, a railing, and two benches costs about $14,000.
The floorboards you choose will impact the price you pay. For example, pressure-treated lumber is often less expensive. Wood composite decking is much more costly.
Materials for Deck Boards
Let’s focus for a moment on the materials you can use for the deck area. These include:
Tropical Hardwoods
Tropical hardwoods are imported and include Ipe. They are top-of-the-line. Since they are so dense and hard, they won’t stain well, but you can oil them for protection from the elements. You’ll often need special clips to attach the hardwood to the joists.
Cedar
Cedar is roughly double the price of pressure-treated wood but contains tannins and inherent oils to help it deal with temperature changes well. Likewise, cedar resists insects, and it’s easy to stain. However, it might splinter or split in time.
Composite Decking Materials
Composite decking is made of recycled and new plastic and wood fibers. Therefore, it won’t need extra coatings or staining. Plus, it won’t rot, split, splinter, or warp. Still, it won’t span well, so you must reduce the joist spacing. Typically, you need hidden clips that the manufacturer lists when using this type of material.
Pressure-treated Lumber
Pressure-treated lumber is easy to obtain, resistant to weather and insects, and relatively cheap. It’s used as the flooring for most decks. However, it’s not friendly to your bare feet, and you could get splinters. Likewise, the wood might warp or crack in time.
What You’ll Need (Pressure-treated Wood, Equipment, and More)
The equipment and tools you need include:
- Speed square
- Electric miter saw
- Garden hoe
- Wheelbarrow
- Post hole digger
- Plumb bob
- Scrap 2x4s
- Mason’s string
- Caulking gun
- Cordless drill
- Tape measure
- Hammer
- Chisel
- Circular saw
- Pencil
- Bubble level
- Ratchet wrench set

You’ll also need these materials:
- Two galvanized metal angle brackets
- Deck screws
- 10D galvanized nails, also called joist hanger nails
- Joist hangers
- Three metal saddles
- Three metal post anchors
- Three J-bolts
- Quick-setting concrete
- Two bags of gravel
- Three concrete tubes
- Exterior-grade caulk
- Galvanized flashing
- 4×1/2-inch lag screws and washers
- Two notched staircase stringers (ground-contact or pressure-treated)
- Two 8x8s or laminated LVL beams
- 2x2s
- 4x4s
- Three 2x6s
- Two 6x6s that are pressure-treated
- 15 2x8s, pressure-treated
Instructions
1. Cut and Size the Ledger Board
- Use your pencil and bubble level to outline the ledger shape on the siding.
- Cut the outline using the circular saw.
- Cut away the siding with a chisel and hammer.
- Remove and dispose of the cut siding.
- Measure the pressure-treated 2x8s to the cutout side.
- Cut your 2×8.
2. Attach the Ledger to the Home
- Cut the galvanized metal flashing to the ledger length.
- Install your flashing under the siding.
- Attach it with nails to the cutout. Don’t use the house studs here.
- Drill pilot holes for your lag screws and counterbores. Do this for every other stud, having two holes for each stud.
- Use your ratchet wrench set to drive the washers and lag screws into your studs.
- Caulk around the ledger with the caulk and gun, including the flashing and lag screw holes.
3. Determine Footing Locations
- Measure out 8 feet from your ledger to where the three post footing locations will be.
- With your scrap 2x4s, build five different batter boards.
- Stake your batter boards to the outside of the deck based on your expected dimensions, with one on each side and three on the end.
- Run a mason’s line between two of your side batter boards above the location of your post footings.
- Run three different mason lines from the ledge to the three end batter boards, which should be above the footer location.
- Drop plumb bobs at the crosses formed by your mason’s lines.
- Mark the ground location where the plumb bob hits, leaving the batter boards and lines in place.
4. Dig and Pour the Deck Footings
- Dig your three footing holes where the plumb bobs are marked. Make sure to go below the frost line.
- Add loose gravel to the bottom up to three inches.
- Cut concrete tubes to your footing hole depth with a hand saw, giving yourself two extra inches. Insert them into the holes.
- Mix concrete in your wheelbarrow.
- Fill your concrete tubes to the top with the concrete.
- While still pliable and wet, insert a J-bolt into each one, ensuring the threaded side is upward and 1 inch is exposed.
- Remove the lines and batter boards.

5. Attach the Posts
- Put metal post anchors over the J-bolts of the footers.
- Put a nut on each threaded J-bolt and tighten them.
- Use an electric miter saw to cut three 6×6 posts. Measure the distance between the top of your concrete piers and the wood beam bottom, making the posts that length plus 1 foot.
- Nail your posts to the metal anchors.
- Plumb your posts, setting each one in place with a scrap 2×4.
- Add cut points to the posts by using a 2×4 as the mock joist. Give it a 1/4-inch drop for every 5 feet to let water drain.
- Mark the cut points for every post, and wrap the mark with a speed square.
6. Install the Beams
- If you aren’t using laminated and exterior-grade beams, make your own by gluing and clamping two 2x8s with construction adhesive and nailing them into place.
- Hold your beam to the posts, marking the locations on the beams.
- Cut the posts off using the marks you made earlier.
- Install your saddle hardware to the top of the posts, ensuring they all run in the same direction.
- Insert your beam and attach it to your saddle hardware with galvanized screws.
7. Build the Outside and Header Joists
- Attach your two outside joists with joist hangers.
- Set the outside joists in place to run from the ledge and across to the beam.
- Attach your header joist to the outside joists.
- Make sure it’s all square and adjust if necessary.
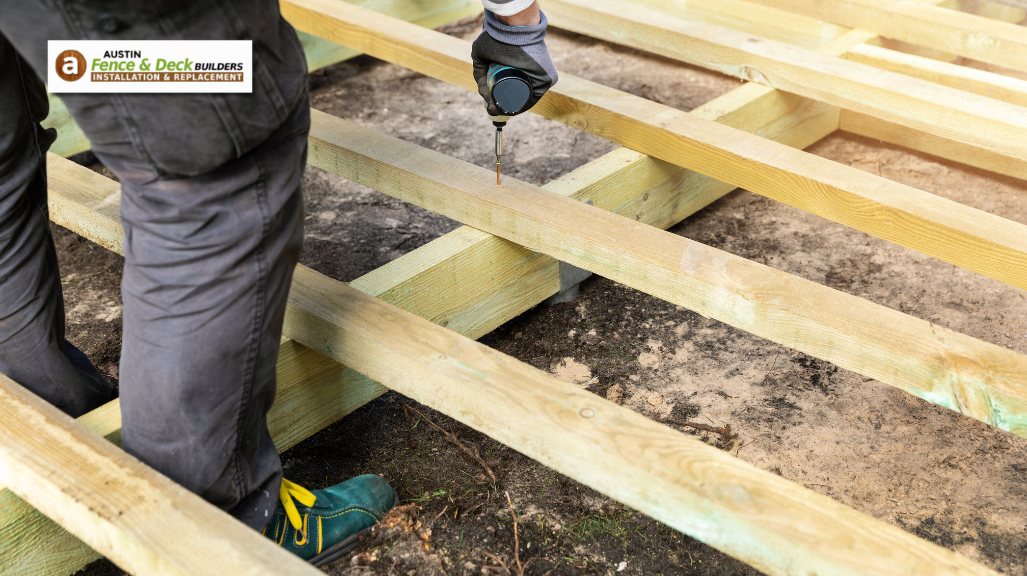
8. Hang the Joist Hangers
Use a tape measure to mark every 16 inches along the ledger length. Repeat that for the deck’s header joist. Nail your joist hangers at the marks, cutting the flooring joist to the specified length.
9. Lay the Deck Board
Put the deck boards on the framework, leaving a 1/8-inch gap. Attach them to the deck joists using deck screws.
10. Install the Staircase
Cut your staircase stringers to the right length, attaching them to the location on the deck side with angled brackets. Cut your 2x6s to have two per step. Then, use deck screws, spacing each deck board by 1/8 or 1/4 inch.

11. Build Your Railing
You’ll cut 4x4s to the right size, boring holes in each one to sink your lag bolts. Then, attach the posts to the deck with lag bolts, nuts, and lock washers.
Why Call a Professional
Deck building can save money when you do it yourself, but it can come with other issues. Though DIY decks can be easier to build if they’re rectangular, square, and single-level, you might want other accessories and features.
Before you start your deck project, it’s wise to contact a professional builder to help you. They have the skills and equipment necessary to do the job effectively. Call Austin Fence & Deck Builders at (512) 799-7574 to request your free estimate today!